Featured photo by Von Famartin / CC BY-SA 4.0
This guide is meant to teach you how to identify & propagate Northern Bayberry (Myrica pensylvanica) and hopefully make it easier for you to sell them at your own nursery.
The idea is to be able to recognize these in the wild and to be able to propagate the specimens for conservation’s sake.

Hardiness Zone: 2 – 7

Soil Type: Well-drained Sand or Humus Soil

Water: Low to medium. Tolerates Salt Spray

Exposure: Full Sun to Partial Shade
Northern Bayberry (Myrica Pensylvanica) is quite a rare perennial plant that naturally grows mostly only on the Eastern Coast of Canada & the United States.
Here are a few characteristics to help you identify wild plants:
How to Identify Northern Bayberry (Myrica Pensylvanica)
Leaves
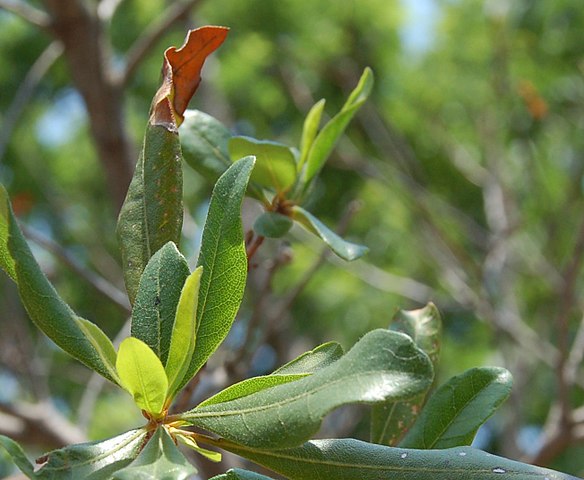
Northern Bayberry leaves are inversely lance-shaped, with entire to softly serrated margins, and grow in an alternate arrangement.
They are a semi-evergreen perennial, which means they lose their leaves during winter if they grow in exposed sites.
When crushed, the 4-10 cm long to 3-4 cm wide leaves are sticky with a spicy scent.
Catkins
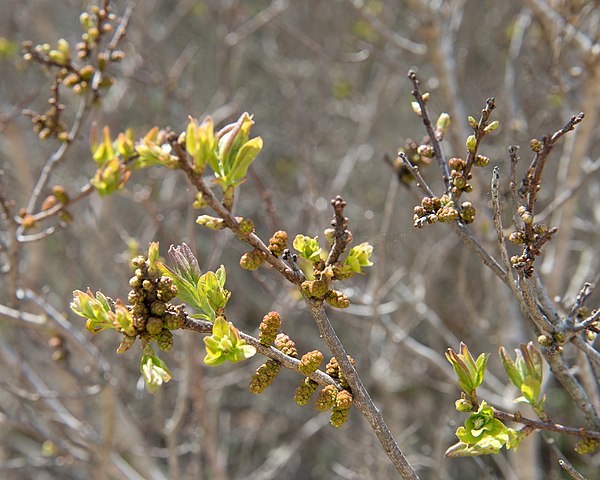
Both male and female catkins (flowers) appear on single plants in early spring before leaves are fully formed.
Neither are especially significant but form greenish-yellow buds.
Fruits
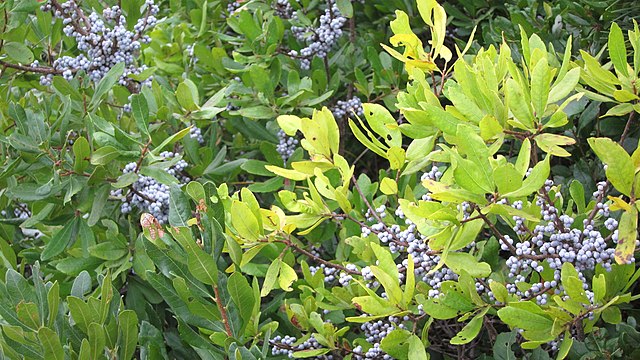
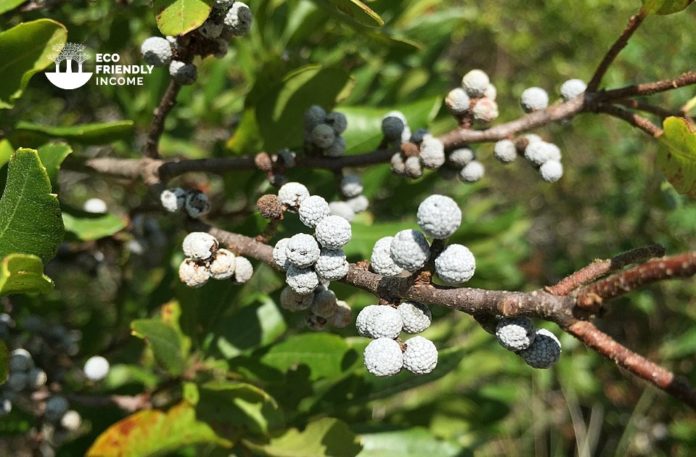
If flowers are properly pollenized, northern bayberry bushes produce aromatic, wax-covered fruits.
The fruits are blue with a tinge of gray. They grow in large clusters tightly along the branches.
Northern bayberry fruits are ready to harvest in late summer and persist through fall.
3 Techniques to Propagate Northern Bayberry (Myrica Pensilvanica)
There are a few techniques you can use to propagate northern bayberry, you can plant the seeds, take cuttings or divide it.
Planting seeds can be done by using the seeds inside the fleshy fruits but with cuttings, you’ll need to take a part of the plant itself.
1. How to Propagate Northern Bayberry by Seed
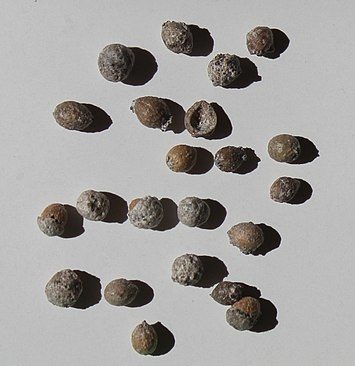
Bayberry seeds need to be extracted from the fruits before you can start the germination process.
If you don’t have access to wild plants, you can always order seeds online here.
Where to Buy Seeds
Photo by Omar Hoftun / CC BY-SA 4.0
The link above is an Amazon affiliates link, as an Amazon Associate, eco friendly income earns from qualifying purchases. Your support will help us continue to provide quality content on plant identification & propagation.
How to Prepare Bayberry Seeds for Planting
If you managed to pick some bayberry fruits in the fall, that’s great. Now let’s prepare those seeds:
It’s might be a bit time-consuming, but what you need to do is remove the waxy coating from the seeds. Doing this will greatly increase the germination rate.
A good trick to remove the waxy coating is to rub the seeds on a screen, the more wax you remove the better.
When your seeds are de-waxed, you can get them ready for the next steps: Scarification, stratification & germination.
- Scarify: Soak in hot tap water, let stand in water for 6 hours.
- Stratify: Place in ziplock bag with a little bit of sand, moisten, then keep in regrigerator for 60 days.
- Germinate: Sow seed 1/4 inch deep ,cover, then tamp the soil (peat & sand mix).
When you’re at the germination stage, you should keep them at a warm temperature, at least 20 degrees Celcius (70F).
Additionally, keeping moisture inside your seed propagation box is important.
After this pre-treatment, seeds should germinate within 3 weeks.
2. How to Propagate Northern Bayberry by Cuttings
Semi-hardwood cuttings are shown to be the most effective way to propagate Northern Bayberry. Semi-hardwood is new year’s growth that’s gone partly hard.
Very important: Take your cuttings only from young, healthy plants. Older plants lose their ability to regenerate over the years.
Timing is also key for cuttings. The best time for bayberry cuttings is mid-June to early September

- First, identify a branch that’s got new growth on it.
- Next, inspect closely to see the difference between old growth and new growth.
- Now take cuttings from that current year’s growth, snip just below where the stem goes from green to brown.
- Scuff up the base of each cutting, for about 1 inch.
- Dip in rooting hormones (2,500ppm IBA) and then plant into your sandy propagation beds.
- Keep watering the rooting medium, sand shouldn’t be too wet but it should stay moist.
- Roots will start forming within 4-8 weeks.
3. How to Propagate Northern Bayberry by Division
The last technique you can use to propagate northern bayberry is by dividing plants.
Since it naturally grows by sending out suckers, you can split them from the parent plant without damaging either of them.
Here’s how you can divide:
- First, locate a mother plant and look around to see new shoots.
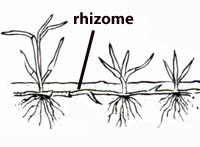
- Once you find a new shoot with viable size, carefully dig around it. You’ll notice a big root coming from the mother plant, that’s the rhizome.
- Then, snip off the rhizome that’s connecting it to the mother plant, but leave part of it attached. There’s some precious energy in there.
- Finally, prune most of the leaves from the shoot, leaving some at the top.
- Store them in a plastic bag for transport with moist soil.
For these divided cuttings, the plant will be in a period of shock but it will recover.
Keep them well-watered but not in direct sunlight until it recovers.
How to Optimize Your Indoor Plant Propagation Setup
If you’re germinating seeds or rooting cuttings indoors, there are three essential items that help optimize your success:
- Heating Mats with Thermostat
- Vented Seedling Trays with Covers
- Full Spectrum LED Grow Lights
I use these at home and have only good things to say.
The links above are Amazon affiliates links, as an Amazon Associate, eco friendly income earns from qualifying purchases. Your support will help us continue to provide quality content on plant identification & propagation.
It’s easy to install, here’s what it looks like completely set up. Each heating mat can hold 6 trays that have 12 slots each.
That means each level of my shelf can produce 72 plants efficiently with good root balls.
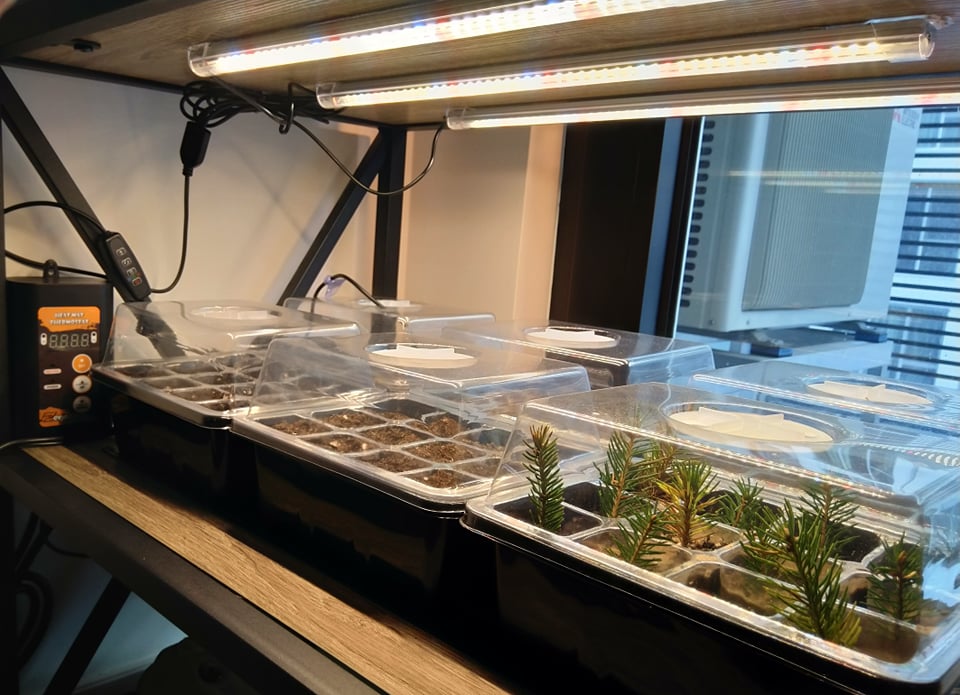
I’ve re-used this numerous times to root cuttings and plant seeds. The thermostat regulates the temperature perfectly, the ligts have a timer and the vented boxes help control moisture.
Shelves like these are perfect for these setups, and you can easily reproduce them on each level for higher production.
This way you can continue to experiment with cuttings and seeds even during cold winter months.
Hopefully, that gives you enough information to propagate northern bayberry yourself!
If you got any tricks to share, please leave a comment down below and share your experience!

Does the scarification and stratification still need to take place in order to germinate indoors? Thank you
Yes, the seed is programmed to go through a cold period before it germinates. Although sometimes the odd seed may still germinate. Cheers