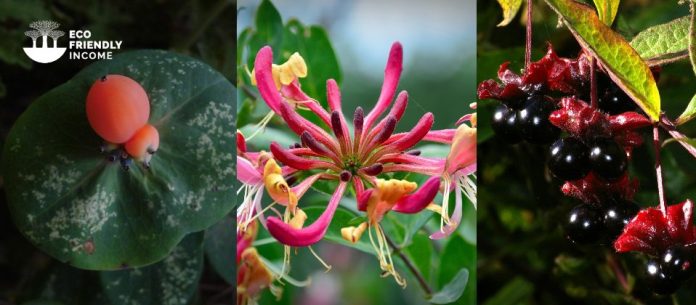
Propagating Lonicera, commonly known as honeysuckle, is an excellent way to expand your garden without breaking the bank.
Whether you’re a seasoned gardener or just starting, propagating through stem cuttings or seed sowing is a simple process that can yield beautiful and healthy plants.
In this article, we’ll guide you through the step-by-step process of how to propagate Lonicera using the best methods.
Note: Please do not propagate invasive honeysuckle species.
If you live in North America, avoid these species at all costs. They damage our ecosystems.
Invasive Species:
| Japanese honeysuckle (Lonicera japonica) | Tatarian honeysuckle (Lonicera tatarica) | Amur honeysuckle (Lonicera maackii) |
| Morrow’s honeysuckle (Lonicera morrowii) | Bells Honeysuckle (Lonicera ×bella) |
Prioritize our native species:
| Mountain Fly Honeysuckle (Lonicera villosa) | Fly Honeysuckle (Lonicera Canadensis) | Swamp Fly Honeysuckle (Lonicera oblongifolia) |
| Northern Bush Honeysuckle (Diervilla lonicera) | Twinberry Honeysuckle (Lonicera involucrata) | Hairy Honeysuckle (Lonicera hirsuta) |
How to Propagate Lonicera by Cuttings
A great method to propagate lonicera is by taking stem cuttings, you have two options, it mostly depends on your timing:
- Hardwood Cuttings – Early Spring or Fall
- Softwood Cuttings – During Summer
We’ll take a look at both methods:
Hardwood Cuttings
If you’re looking at this during early spring or early fall, the type of cuttings you can take right now are hardwood cuttings. Those are when the plant is dormant.

Very important: For any source of cuttings, choose a young, healthy plant (at least 2 years old). Older shrubs are less vigorous and harder to root!
Step 1: Harvest the Cuttings
- Inspect: Take a close look at your honeysuckle and look for branches with new, hardened growth.
- Clip: Use some sanitized clippers and cut a branch underneath a node, then clip the top part off to get 2 nodes in total (one at the top, one at the bottom).
- Size: Cuttings should each be about 6-8 inches long, and have a decent thickness (thin hardwood cuttings dry out easily).
- Strip: If the cuttings already had some leafy growth on them, remove the leaves on the bottom node, and pinch off only the new leaf bud from the top (keep the old leaves on the top node).
- Scuff: Finally, give a very light scuff with your clippers on the bottom of each cutting to expose the cambium.
Step 2: Root the Cuttings
- Prepare: Use a well-draining mix like peat moss with perlite, or just plain coarse sand (for this part, the soil should have no nutrition).
- Poke: Next, fill your propagation box with the soil mix, then prepare the soil by poking holes with a dibbler.
- Treat: Then, lightly coat the tip of your cuttings in rooting hormone and slide them in (make sure they’re the right way up).
- Expose: Now place the propagation box in a spot with indirect sunlight.
- Maintain: Water regularly and make sure they are well-ventilated (cuttings will rot if they’re constantly wet with no ventilation).
- Root: Now we wait! Give the lonicera cuttings the whole summer to root, by fall they’ll have hefty roots.
- Harden: Finally, bring them in your greenhouse for the winter, or if you can’t, make sure they get covered by snow (it insulates them from cold winds).
Now your cuttings will have been hardened, in the spring, they’re ready to be transplanted into pots.
Now you can use a nutrient-rich compost mix, and add extra oomph with slow-release fertilizing granules.
Softwood Cuttings
Now if you’re well into the growing season, then you can propagate lonicera by taking semi-hardwood cuttings.
The best time to do that is from June until the end of August.

Follow the 6-week rule!
Generally, you want to wait 6 weeks after the first spring growth to harvest semi-hardwood cuttings. By that time, they’ll have hardened enough not to droop over when you cut them.
Recommended Rooting Medium: Coarse sand, or a mix of peat and perlite.
The process is similar to hardwood cuttings, with a few important changes.
Step 1: Harvest the Cuttings
- Inspect: Find your lonicera vine, and look for the current season’s growth.
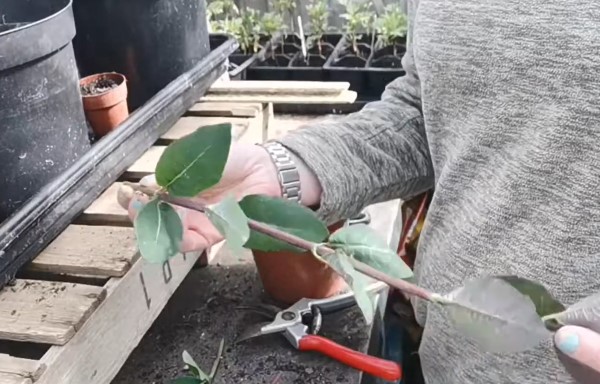
- Clip: Next, snip a long branch off, just below where the stem turns from green to brown.
- Size: Snip the long branch into cuttings, as short as you can, as long as you get 2 nodes per cutting.
Note: Always make sure the bottom cut is directly below the node.
Step 2: Prep & Root
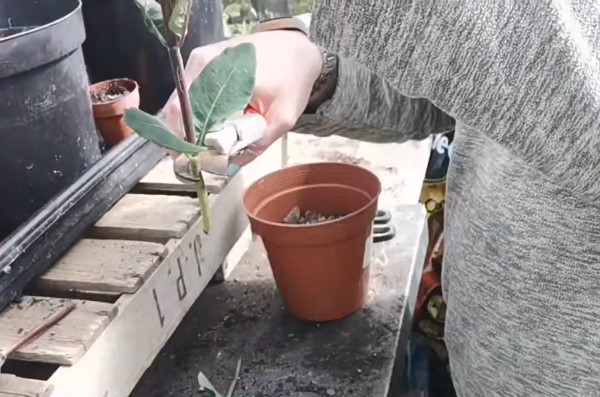
- Strip: Now remove the leaf bud on the bottom node, and leave some leaves on the top node.
- Treat: Dip the cuttings in rooting hormone, and knock off excess powder (a quick dip in water first will help it stick).
- Poke: Prepare the holes beforehand, this way you don’t push the cutting into the soil and remove the powder.
- Support: Add a popsicle stick or a bamboo stick for the vine to climb onto.
- Expose: Place the cuttings in a location with indirect sunlight, too much sun will burn them.
- Maintain: Keep the soil moist, but not waterlogged. You can cover it with plastic to maintain high levels of humidity, but make sure to ventilate periodically.
Honeysuckle (lonicera) can root quite quickly, within 3-4 weeks. A good time to transplant is when you start seeing roots coming out of the bottom.
Keep in mind that propagating lonicera, like any other plant is all about the right timing. If you don’t succeed at first, it might have just been the wrong timing for that specific plant.
- Re-pot: Now you can pot them up in a nutrient-rich compost mix, and fertilize them with slow-release granules.
- Harden: Gradually give them less water, and place them in an area with more exposure to the elements.
How to Propagate Lonicera by Layering
Layering is the easiest method to propagate lonicera, and there’s barely any preparation required.
Although you will need established plants, and it’s not the best method for large-scale propagation for a nursery.
Note: The best time to start ground layering honeysuckle is springtime.

All you need is a few of those long garden staples.
The link above is an Amazon affiliates link. As an Amazon Associate, eco-friendly income earns from qualifying purchases. Your support will help us continue to provide quality content on plant propagation and identification.
Here’s the gist of it:
You take a long branch and bend it over to the soil, and bury a part of the stem where the node is.
Don’t bury it too deep, a couple of inches will do, and make sure to pluck any leaves on the node first.
Note: You can lightly scuff up the bark to help start the rooting process.
Next, use the gardening staple to hold the branch under the soil.
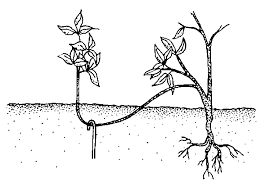
It takes between 4-6 weeks for decent roots to form on the buried honeysuckle branch.
After that, you can separate the branch from the mother plant by snipping it with sanitized secateurs.
Finally, transplant it into a rich nutrient-rich compost, add fertilizing granules, and let the plant harden.
How to Propagate Lonicera by Seed
The last method, and probably the most forward, is to collect seeds and germinate them yourself.
- You have the choice to harvest by hand, which means you’ll know the exact details of when they were harvested and stratified.
- Or you could order online, which usually doesn’t give you details on the harvest date and if they were stratified or not.
Online, Sheffields sells many species of honeysuckle (lonicera). Again, stay away from invasive species.
How to Harvest Seeds
The best time to harvest honeysuckle (Lonicera) seeds is late summer to early fall.

Wait as long as you can to really get the ripest fruits. Look for lonicera berries that are starting to get soft, this means they are fully ripe.
It’s a hard thing to achieve because you’ll be competing with birds.
On the other hand, you can harvest them a bit early and let them ferment in a plastic bag.
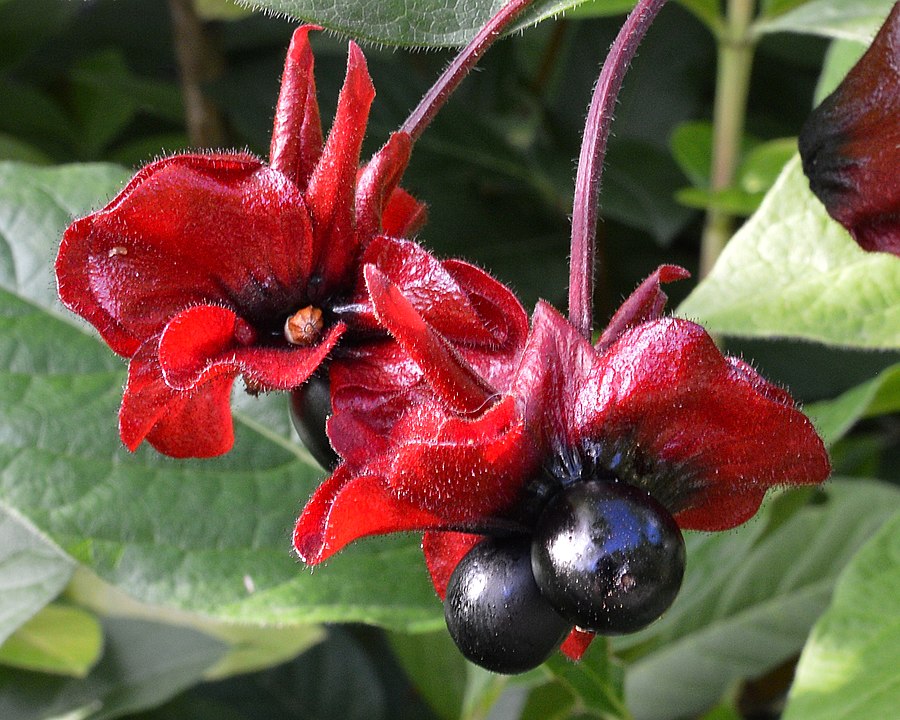
Photo by Ryan Hodnett / CC BY-SA 4.0
The fruits contain multiple seeds each, there are a couple of ways you can extract them:
Here are the 2 options you can try:
Small Scale
- Squish the fruits open, and use tweezers to pick out the seeds from the flesh.
- Or you can rub the fruits through a screen to remove the pulp, then drain them with water through a sieve.
Large Scale
- Run the seeds through a blender with soft blades.
- Drain through a sieve to remove the pulp.
- Dry the seeds on a screen, away from direct sunlight.
- Run the seeds through a seed blower to remove the chaff.
Next, let the seeds air dry in a cool, well-ventilated place away from direct sunlight.
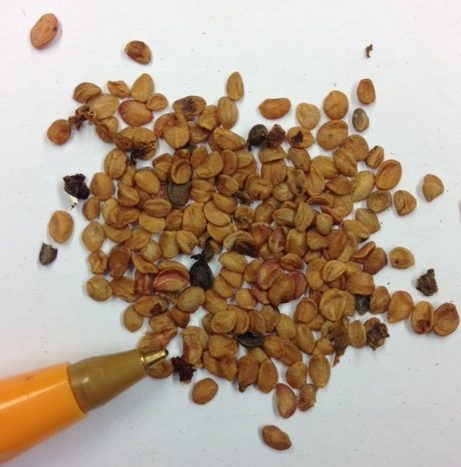
Stratification
The next step for lonicera is to treat the seed with cold stratification. For most lonicera species, it’s a minimum of 60 days.
If you’re in no rush, you can stratify them the whole winter and take them out of the fridge in time for spring.
Here’s how to cold stratify honeysuckle seeds:
- Begin cold stratification: Place the seeds in a ziplock bag with sand, and lightly moisten. Tag the bag with the name and date, then place it into the very back of a refrigerator for 60 days.
- Awaken the seeds: Take your seeds out and soak them in room temperature water for 12-24 hours. After this, place them back into your refrigerator for another 30 days.
Ideal Soil to Sow Lonicera Seeds
An ideal soil to start honeysuckle from seed is one with great aeration and drainage.
For example, Sunshine Mix #4 Aggregate Plus has everything you need for your plant to get started (peat moss, perlite, major and minor nutrients, gypsum, and dolomitic lime).
- Peat moss will fluff up and give good aeration while maintaining good moisture.
- Perlite helps with drainage and aeration.
- Nutrients will help your seeds pass the germination stage.
- Gypsum has calcium that helps your seedlings grow strong stems.
- Dolomitic lime helps regulate pH and adds magnesium which helps plants absorb nutrients.
Sowing
After you cold-stratified your seeds, sow them under 1/16″ of soil, then lightly tamp the seedbed.
Carefully, if you over-compact, you really make it hard for the seeds to germinate and root efficiently.
Maintain moisture and ventilate from time to time.
Honeysuckle (Lonicera) seeds generally take 2 weeks to germinate.
Establishment
- Transplant: After another 2 weeks, transplant the seedlings from your seed beds into individual pots.
- Soil: This time, use a potting mix of peat moss, bark, perlite, and sand.
- Fertilize: A month after transplant, fertilize with slow-release granules such as nutricote (NPK 13-13-13).
- Pruning: 2 months after transplant, prune back the long stems but make sure you always keep at least 4 nodes on the branches.
Cold Frame Sowing
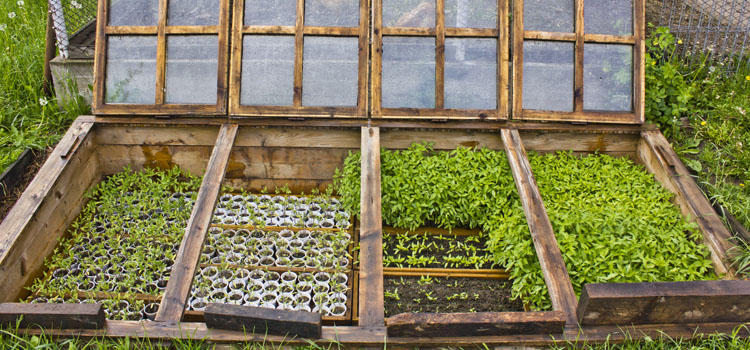
Alternatively, you can sow the seeds in a cold frame during fall, let nature do the stratification, and get them to germinate naturally the following spring.
This technique is less controlled and more subject to failure since animals can get after your seeds, and surprise frost and damage your seedlings.
That’s it! I hope that covers everything you need on how to propagate lonicera plants.
If you have additional questions, please comment below.
Blessings!
FAQ
A: Yes, lonicera is the genus of honeysuckle plants.
A: Many honeysuckles like to climb; plant them near a wall, fence, or trellis. Ideally, make sure the roots are in a shady location.
A: Yes, in many cases lonicera is evergreen and will maintain its leaves, although harsh cold will cause the leaves to drop or wilt.
A: A good idea is to mulch the base of the plant to keep the roots well moist, and additionally you should add some fertilizer every spring.
A: Many imported lonicera species such as Japanese honeysuckle, Tatarian honeysuckle, and Amur honeysuckle are very invasive in North America. Please choose native species instead.
A: Choose a time when the soil is cool, like spring or fall, since the roots like to establish themselves in these conditions.

